![login-logo.png]](https://helpcenter.casafari.com/hs-fs/hubfs/login-logo.png?height=23&name=login-logo.png)
This feature is divided into 3 areas:
B - Submission of the Survey and Evolution
A - Creation of Surveys
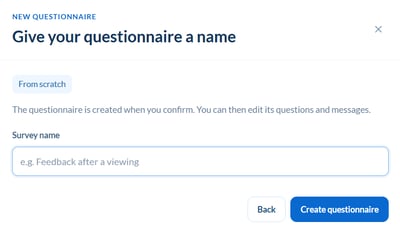
1. In the area of Surveys - List - Add New define the Survey Name.
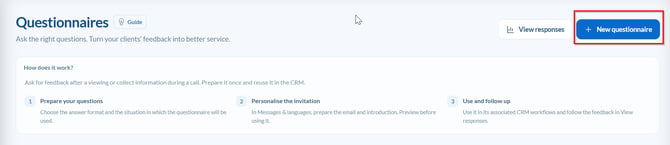
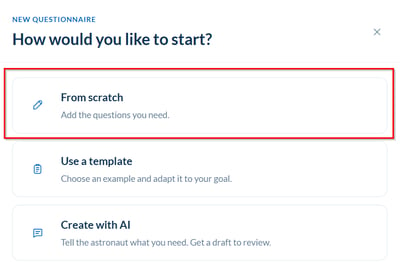
2. Select the desired options for the questionnaire:
From scracth: Create a new questionnaire and add the questions you need.
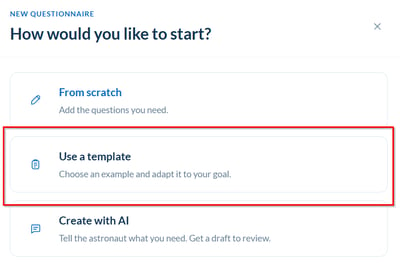
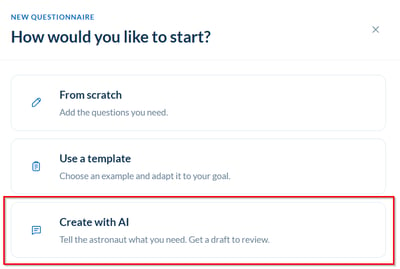
Use a template: Select a template from the list and adapt it to your objectives. These templates already include predefined questions, which you can customise to meet your needs.
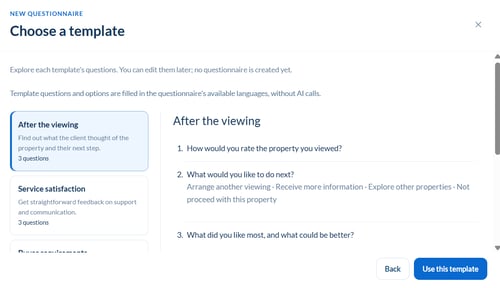
Create with AI: Use artificial intelligence (AI) to generate questions and receive a suggested questionnaire that you can review and adapt to your needs.
3. Configure the questionnaire: Once you have created it, add or adapt the questions and set up the survey flows according to your needs.
Questions:

1. Enter the questionnaire title:

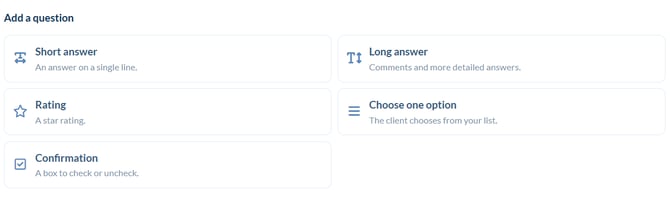
2. Select a question type from “Add question” to get started.

3. Choose the response type:
- Short answer: The customer enters their response on a single line.
- Rating: The customer provides a rating using stars.
- Confirmation: The customer selects or deselects a checkbox.
- Long answer: The customer writes a comment or provides a more detailed response.
- Multiple choice: Define the available answer options so that the customer can select their preferred option.
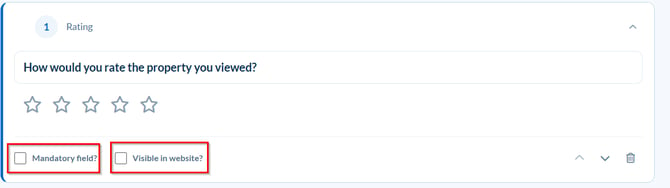
4. Select a question to edit it. Enable the “Required field” option if you want the customer to be required to answer. Enable the “Visible on website” option to display the question and its questionnaire on the website.
5. Once you have finished editing the questions, save your changes.

Settings:
1. Define how the questionnaire will be used and prepare the accompanying text.

2. Define where to use the questionnaire:
Survey type: Select the CRM workflow to which you want to assign the questionnaire. Each workflow can only have one associated questionnaire. If you save a questionnaire to a workflow that already has one assigned, the new questionnaire will automatically replace the existing one.
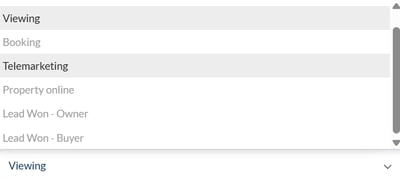
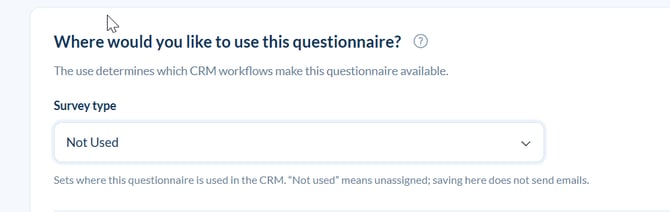
Questionnaire type: “Not used”: Select this option to save the questionnaire without associating it with any workflow.
Note: Selecting the “Not used” option means that no email containing the questionnaire will be sent.
3. Invitation and response page:
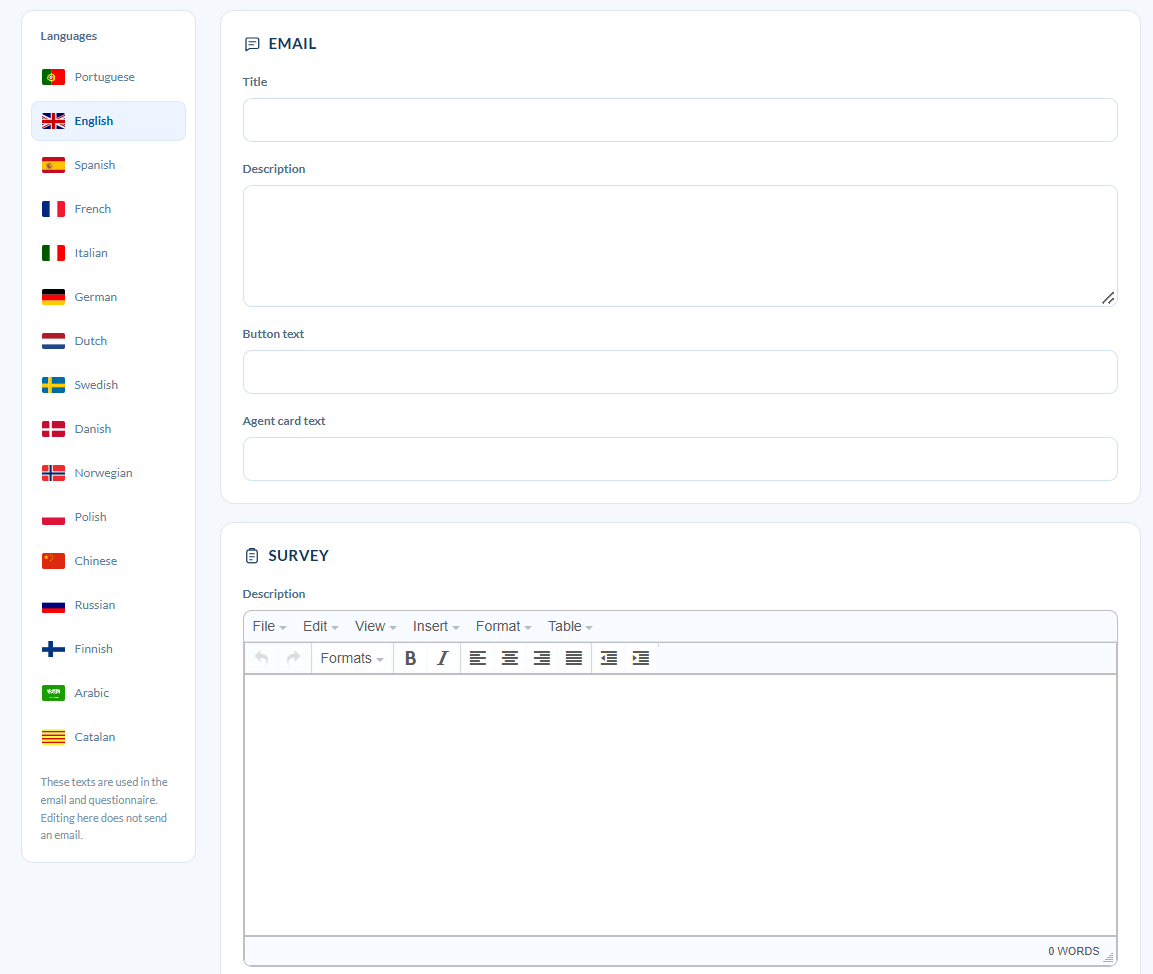
Texts and languages: Set the email and prepare the corresponding text for each language you want to make available.
Customising the email:
- Title: Define the email subject/title.
- Description: Text displayed in the body of the email.
- Button text: Text displayed on the button that allows the recipient to open the form.
- Agent card text: Text displayed on the card associated with the agent.
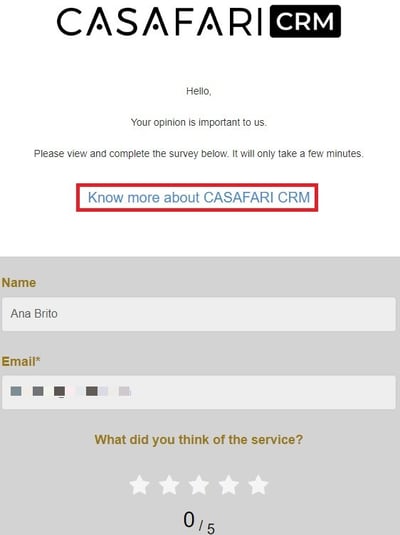
- Questionnaire description: Descriptive text displayed on the form page. Here, you can add a link to the questionnaire’s introductory text. This link must always be added using the following format: <a href=’link’>texto</a> Example:
- <a href=’https://www.casafaricrm.com ’>Saiba mais sobre o CASAFARI CRM</a>
It’s essential to fill in this information so that the surveys can be sent. The OPT-IN request must be accepted by the client and/or owner of the property.
4. Preview: Preview the questionnaire before sending it. Selecting this option will open a page where you can view and review the questionnaire.
5. Save changes:

It’s essential to fill in this information so that the surveys can be sent. The OPT-IN request must be accepted by the client and/or owner of the property.
B - Submission of the Survey and Automation
Viewing
After viewing a property, collect feedback from the potential buyer to know their satisfaction.
Automation of the survey submission:
1. Go to Configuration - General Data - Automation - Survey.

2. Define when the survey should be sent after the visit:

3. Send a copy of the survey submission to the agent. Select the checkbox for this purpose.
4. Click on Save.
Survey Submission Evolution:
1. Access Events - Events List.
2. Choose a "Viewing" event and check the status of the Thermometer:
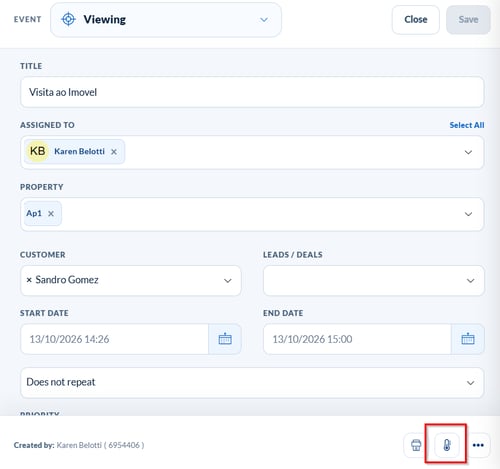
The status of the thermometer will be an indicator of the status of the survey:
- Empty: not sent
- Half Full: sent
- Full: answered
Telemarketing
The survey is automatically sent to the telemarketing agent to fill in the information to qualify the lead.
Filling in the survey:
1. Go into Leads/Business - Sales - List.
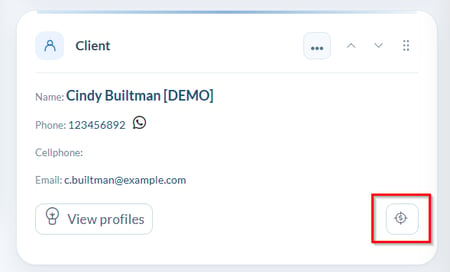
2. Select the lead and click the button highlighted below to access the survey:
Viewing the completed Survey:
1. Go to Contacts - Buyers List.
2. Select the contact and access the detail.
3. Fill in the survey for the lead qualification, and select the option "Telemarketing Profile".

Property Online
It’s a survey sent to the property owner when the agent put the property visible on the website of the agency.
Automation of the survey submission:
1. Go to Configuration - General Data - Automation - Survey.
2. Define when the survey should be sent after the agent makes the property visible on the website.

3. Send a copy of the survey submission to the agent. Select the checkbox for this purpose.
4. Click Save.
Lead Won - Buyer:
The survey is sent to the buyer after the sale of a property.
Automation of the survey submission:
1. Go to Configuration - General Data - Automation - Survey.

2. Define when the survey should be sent out after the deal is closed by the agent.

3. Send a copy of the survey submission to the agent. Select the checkbox for this purpose.
4. Click Save.
Lead Won - Seller:
The survey was sent to the property owner after the property sale.
Automation of the survey submission:
1. Go to Configuration - General Data - Automation - Survey.
2. Define when the survey should be sent out after the deal is closed by the agent.

3. Send a copy of the survey submission to the agent. Select the checkbox for this purpose.
4. Click Save.
C - Results
1. Access Surveys - Surveys Results.
2. Use filters for an optimized search:
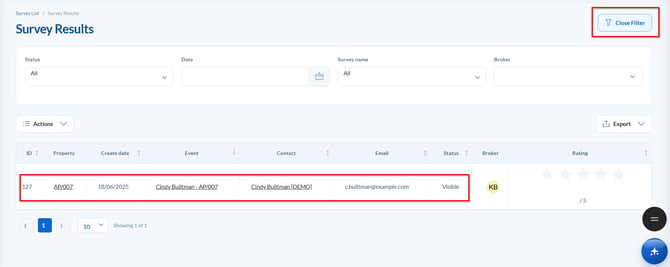
3. Choose the answer and have access to all details of the survey.
This new is available in the PREMIUM Plan.
For more information, please contact us by email: help@casafaricrm.com