![login-logo.png]](https://helpcenter.casafari.com/hs-fs/hubfs/login-logo.png?height=23&name=login-logo.png)
CASAFARI CRM has a photo editor easy to use, which will allow you to give the finishing touches to your property photos.
See the step-by-step and get to know this tool:
Photo Uploading and Editing:
1. Go to Properties - List.
2. Select the property and view the details.
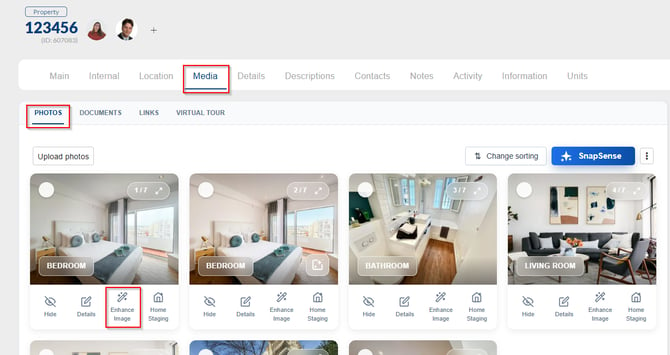
3. Go to the “Media” area and on the “Photos” tab, click on “Upload photos” to insert a new photo.
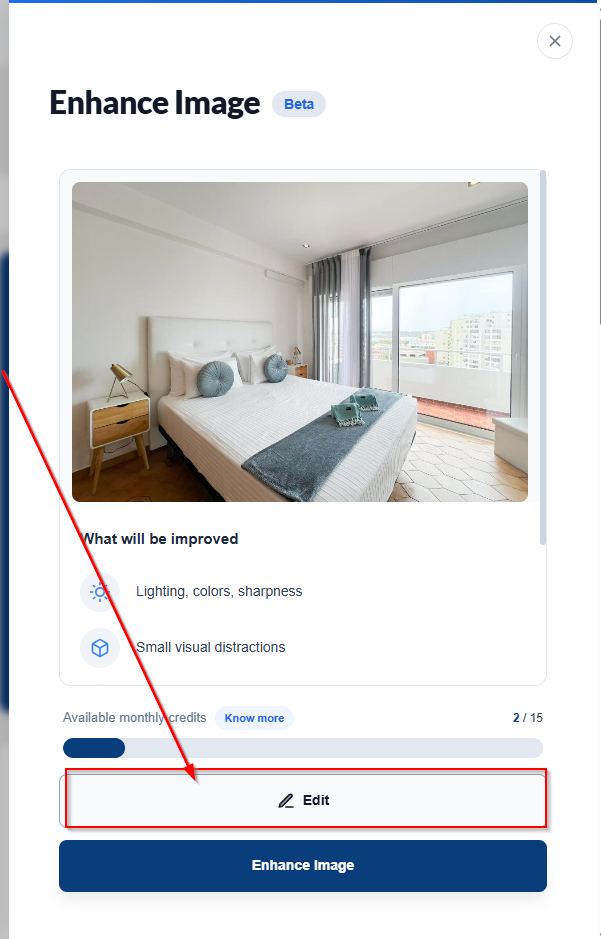
4. Click on "Enhance Image" and then click "Edit" to open the editor:
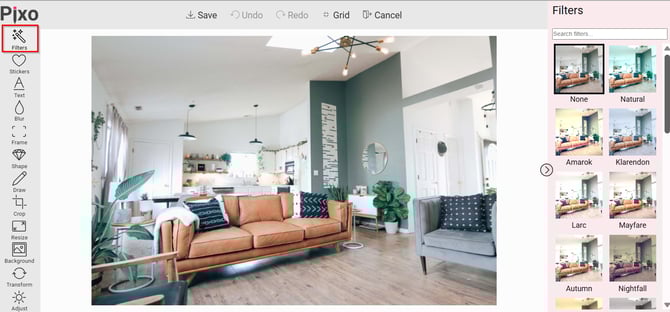
5. If you wish, add a filter to the image: click on "Filters" and select the one you want in the right sidebar.
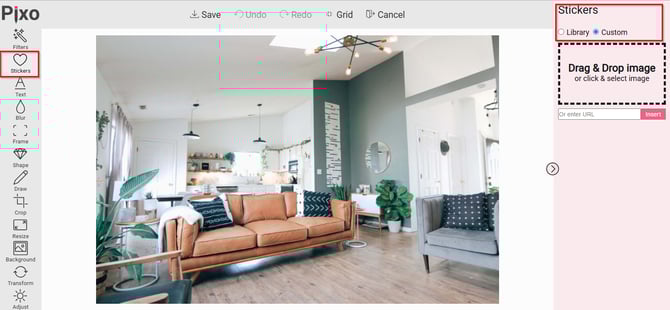
6. In the “Stickers” area, choose an existing one or upload an image to customize.
7. Write a text to add to the image and select the font, size, format, alignment, and color.
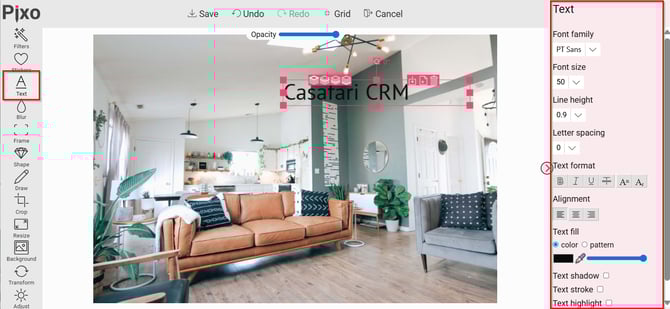
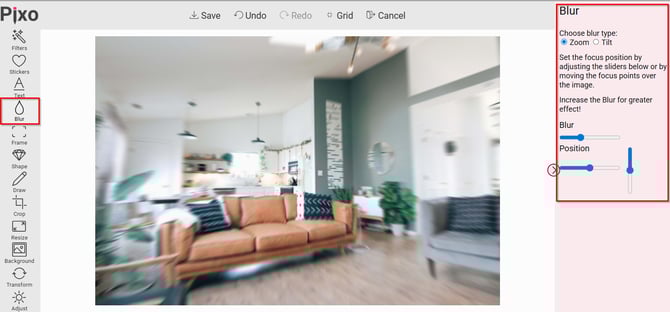
8. Select whether you want to blur the image by selecting the "Zoom" or "Blur" options. Increase or decrease the effect by changing the "Tilt" and "Blur" options and set the position you prefer in "Position."
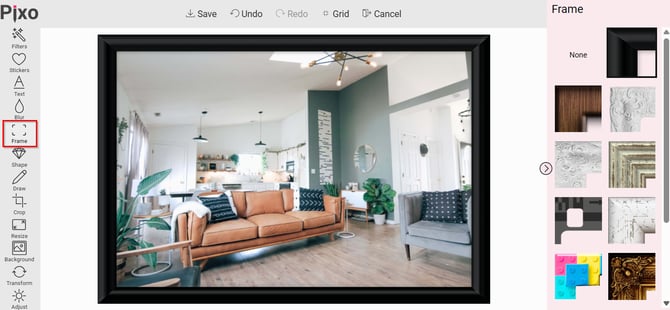
9. Check the option “Frame” to add a frame to the photo.
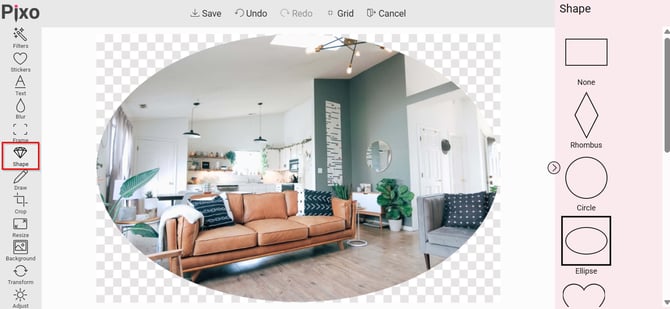
10. Change the shape of the image and choose a new format in the “Shape” option.
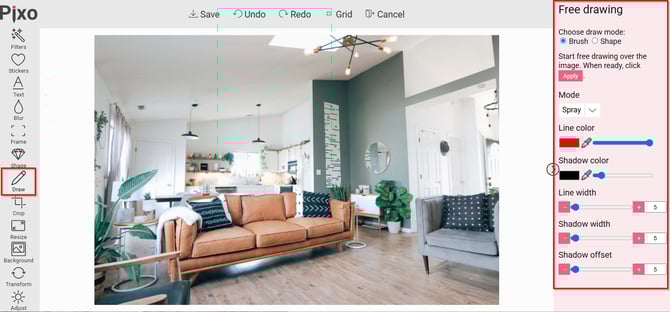
11. Make a freehand drawing by selecting "Brush" or select a predefined one by selecting "Shape" and choose the color, shadow, and other settings.
12. Crop the image as needed in the “Crop” area.

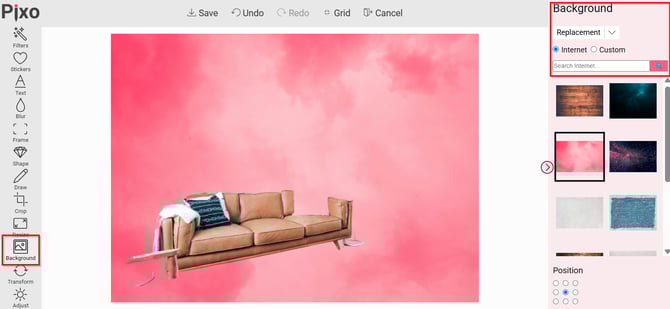
13. Check the “Background” option to set and/or change the image background, by clicking on “Custom” you can select a background from your files.
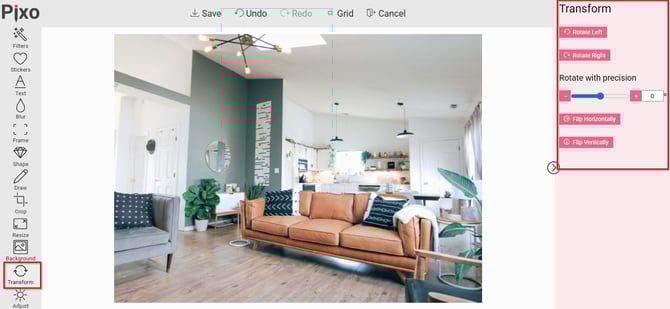
14. Change the position of the image.
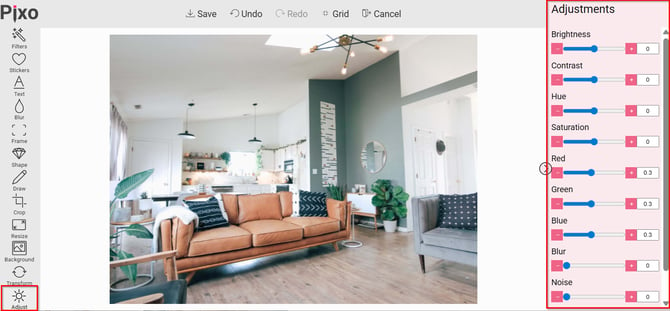
15. In the “Adjustments” area, adjust the brightness, the saturation, the contrast of the image, among other features.
16: Top bar:

-
Save: Use to save the image.
-
Undo: Use to undo the change.
-
Redo: Use to redo the change.
-
Grid: Use to add grids to the photo:
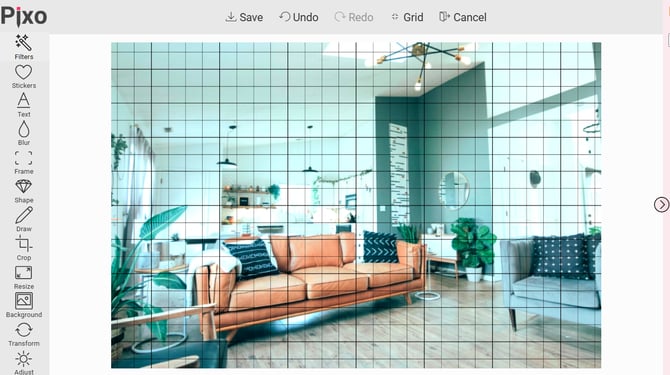
- Cancel: Use to exit the editor without saving the changes.
17. Finish editing the image and click “Save” to apply the changes.
Add a description to the photo:
1. In the property detail, check the option Media - Photos.
2. Choose the photo and click on "Details":
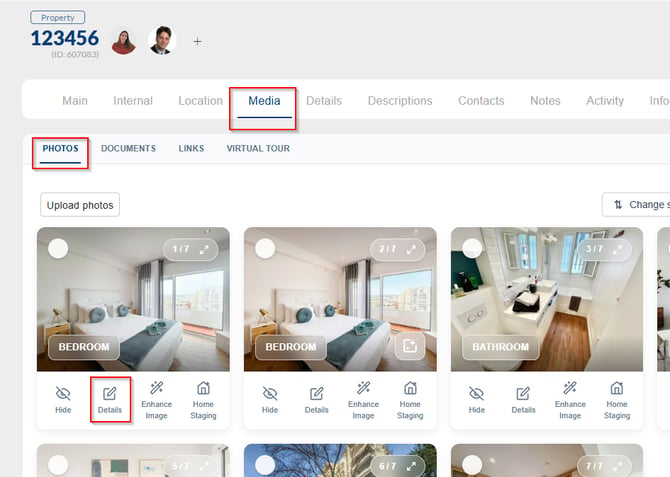
3. Define which category the image belongs to, add a description. You can also select whether they will be visible or not.
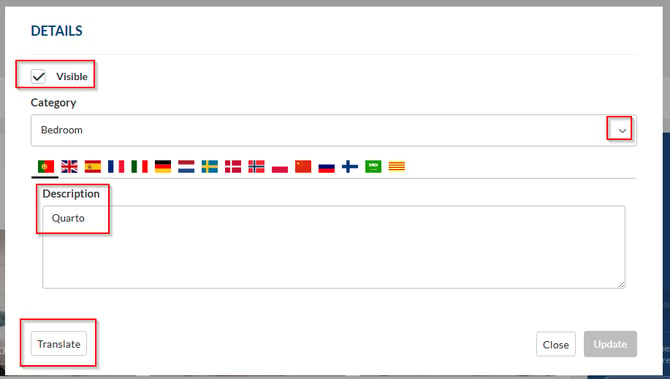
4. Apply translations and click Update.
Image Disclosure:
1. Access Properties - List.
2. Select the property and view the details.
3. Check the option Media - Photos and choose the image.
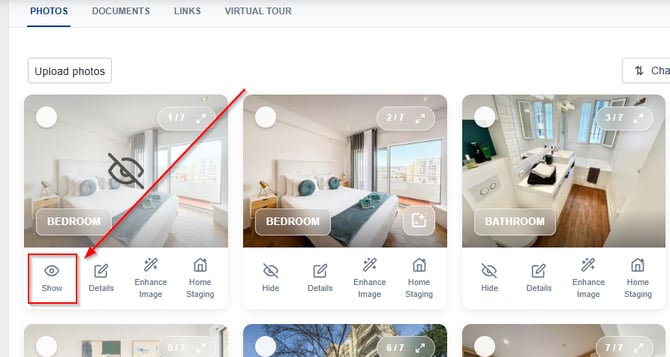
4. By default, photos are always visible. If you want to hide a photo so that it is not displayed on the website or sent to property portals, click Hide:
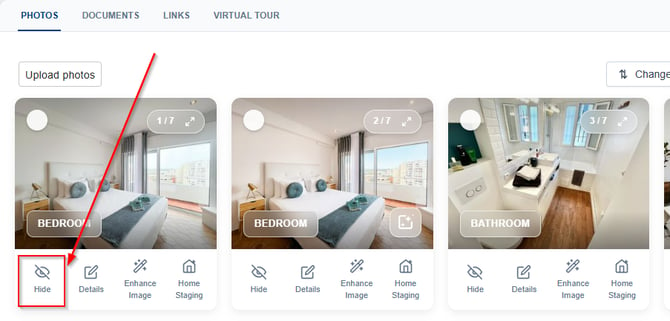
5. To display/send the image again, click on Show:
This feature is available in the PLUS and PREMIUM plans.
For more information, send an email to: help@casafaricrm.com